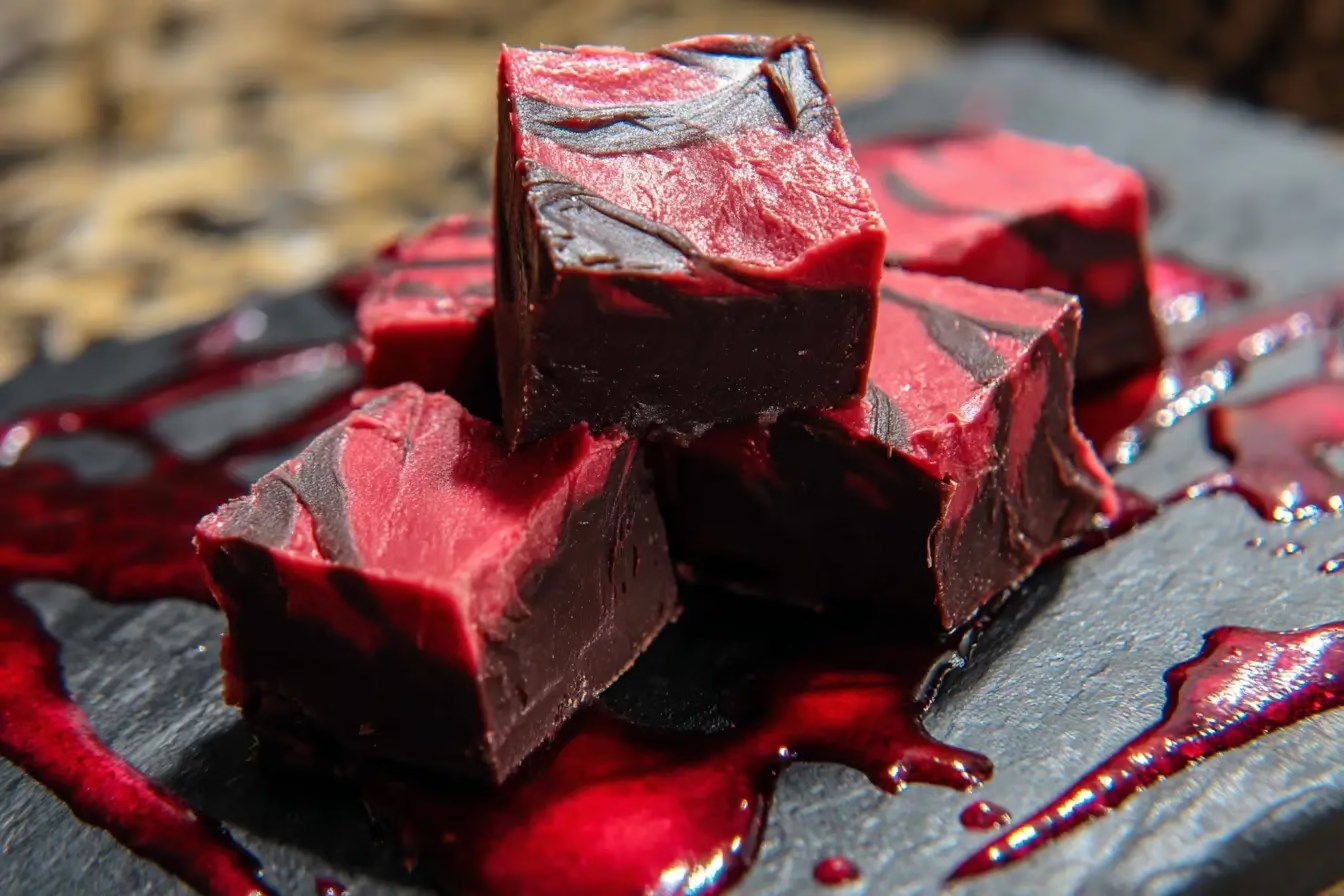
The first time I made this Vampire Fudge, my kids gasped when they saw the dramatic swirls of red and black sitting on the counter. It wasn’t just candy—it looked like something straight out of a spooky storybook. Halloween has a way of bringing out the playful side of baking, and this fudge nails it. It’s rich, creamy, and ready in no time. Plus, it’s the perfect treat for parties, neighbor gifts, or even a fun kitchen project with kids on a chilly October evening.
Unlike traditional fudge that requires a candy thermometer and a bit of patience, this version is a no-fuss recipe that leans on candy melts and frosting. The result? Bold colors, decadent flavor, and a dessert that sets up beautifully with minimal effort.

Vampire Fudge
Ingredients
- 1⅓ cups white candy melts can substitute with white chocolate chips
- 1⅓ cups dark chocolate candy melts semi-sweet chocolate chips + black food coloring can be used instead
- 16 ounces vanilla frosting store-bought, in a tub
- red oil-based food coloring do not use water-based or gel coloring
- black oil-based food coloring essential for rich color in the dark chocolate swirl
Instructions
- Line an 8×8-inch baking dish with parchment paper or aluminum foil, leaving overhang for easy removal. Lightly spray if using foil.
- Place white candy melts in one microwave-safe bowl and dark chocolate melts in another.
- Microwave each bowl in 30-second bursts, stirring in between, until fully melted and smooth.
- Remove the lid and foil seal from the vanilla frosting. Microwave on high for 35 seconds, or until pourable.
- Divide the melted frosting equally between the two bowls of candy melts.
- Add red oil-based food coloring to the white candy melt bowl and black to the dark chocolate bowl. Stir until evenly colored.
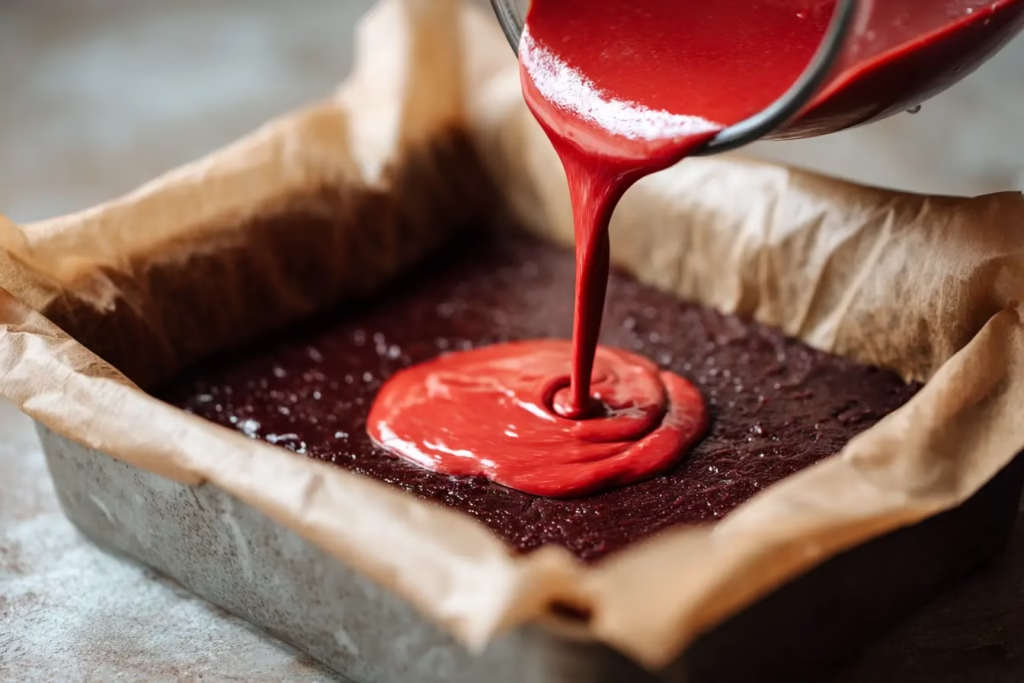
- Alternately spoon red and black mixtures into the prepared baking dish to create layers.
- Use a toothpick or butter knife to gently swirl the colors together for a marbled effect. Avoid overmixing.
- Cover the dish with plastic wrap and refrigerate for at least 1 hour, or until completely set.
- Lift the fudge from the dish using the parchment overhang. Peel away the paper and cut into squares or use cookie cutters for festive shapes.
Notes
Nutrition
Why You’ll Love This Vampire Fudge
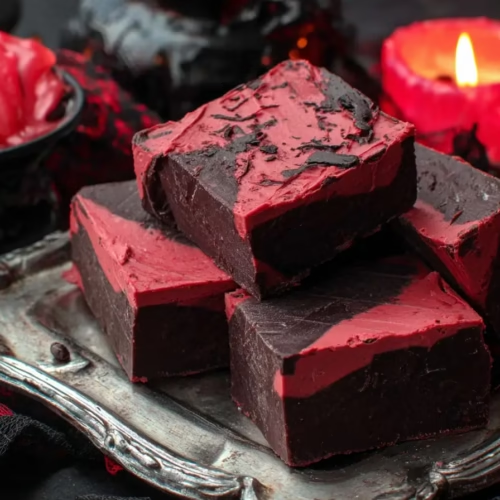
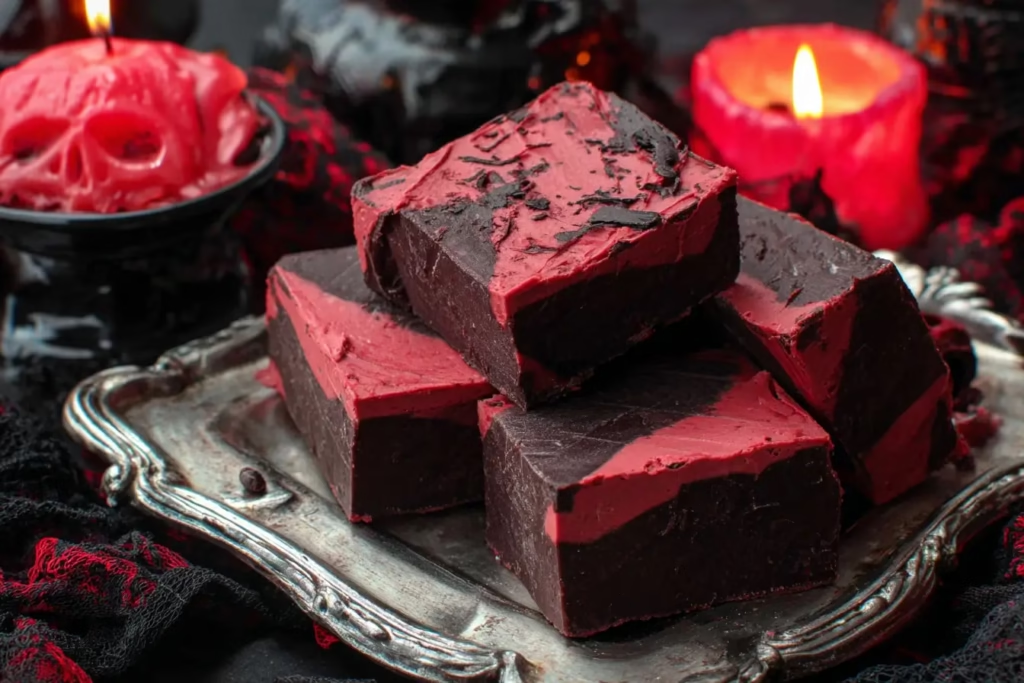
1. A Visual Showstopper
Red and black swirls give this fudge a gothic flair that’s perfect for Halloween dessert tables. It’s the kind of treat that makes guests say, “Wow—how did you make that?”
2. Foolproof for Beginners
No candy thermometer. No tricky sugar stages. Just melt, mix, swirl, chill, and slice. Even if you’ve never made fudge before, this recipe will turn out beautifully.
3. Perfect for Gifting
Cut into squares and wrap in clear bags tied with ribbon—or use Halloween cookie cutters for bats, pumpkins, or coffins. Instant edible gifts!
4. Kid-Friendly Fun
Kids love helping with the swirling step, and it’s a safe recipe since there’s no stovetop boiling involved.
(For another festive dessert idea, check out my Pumpkin Bars or these whimsical Strawberry Shortcake Candy Apples.)
Ingredients Breakdown (and Substitutions)
Ingredients Breakdown
- White Candy Melts (1⅓ cups) – These melt easily and provide the bright base for your red swirl. Substitute with white chocolate chips if you can’t find candy melts.
- Dark Chocolate Candy Melts (1⅓ cups) – Essential for the rich black swirls. Semi-sweet chocolate chips can work, but add a touch of black food coloring.
- Vanilla Frosting (16 ounces) – The secret shortcut ingredient that makes this fudge creamy without complicated sugar syrup.
- Red Oil-Based Food Coloring – Gel or liquid colors won’t blend well with chocolate. Stick to oil-based for best results.
- Black Oil-Based Food Coloring – Deepens the dark chocolate swirl for that spooky look.
Tip
Candy melts come in different brands. Choose ones labeled “compound chocolate” or “coating chocolate” for smooth melting.
Step-by-Step Instructions
- Prepare the Dish
Line an 8×8-inch baking dish with parchment paper or aluminum foil. If using foil, spray lightly with cooking spray. Leave an overhang for easy lifting later. - Melt the Candy Melts
Place white candy melts in one bowl and dark chocolate melts in another. Microwave in 30-second bursts, stirring each time, until smooth. - Heat the Frosting
Remove the lid and foil from the frosting container. Microwave on high for 35 seconds until pourable. - Divide and Color
Pour half of the melted frosting into each bowl of candy melts. Add red food coloring to the white melts and black to the dark chocolate melts. Stir until fully colored. - Create the Layers
Pour alternating spoonfuls of red and black fudge into the dish. - Swirl for Drama
Drag a toothpick or butter knife through the mixture once or twice for a marbled effect. Don’t overmix—less is more. - Chill Until Set
Cover with plastic wrap and refrigerate for at least 1 hour. - Cut and Serve
Lift out using the parchment overhang, peel back the paper, and cut into squares or shapes with cookie cutters.
Variations, Storage & Serving Ideas
- Cookie Cutter Fun – Use bat, pumpkin, or coffin cookie cutters to make themed shapes.
- Flavored Frosting – Try cream cheese or chocolate frosting for flavor twists.
- Bloody Raspberry Fudge – Swirl in raspberry jam with the red portion for a fruity surprise.
- Storage – Keep in an airtight container in the fridge for up to 1 week. For longer storage, freeze up to 2 months.
Pair a square of Vampire Fudge with a cup of Hot Chocolate Poke Cake or serve alongside Gingerbread Truffles for a festive holiday spread.
FAQs About Vampire Fudge
Q1 Can I make Vampire Fudge ahead of time?
Yes! It actually sets better overnight. Simply prepare it a day in advance, cover tightly, and refrigerate until ready to cut and serve. It’s a stress-free option for party prep.
Q2 What kind of food coloring should I use?
Always use oil-based food coloring for candy melts or chocolate. Water-based or gel colorings will cause the chocolate to seize, making it grainy and unusable.
Q3 How do I keep the colors vibrant?
Start with bright, concentrated food coloring. If your fudge looks too light, add more color gradually until you achieve a bold, rich red and deep black swirl.
Q4 Can I freeze Vampire Fudge?
Yes. Wrap squares tightly in parchment and store in a freezer bag. Thaw in the fridge overnight before serving. Freezing helps preserve both flavor and texture.