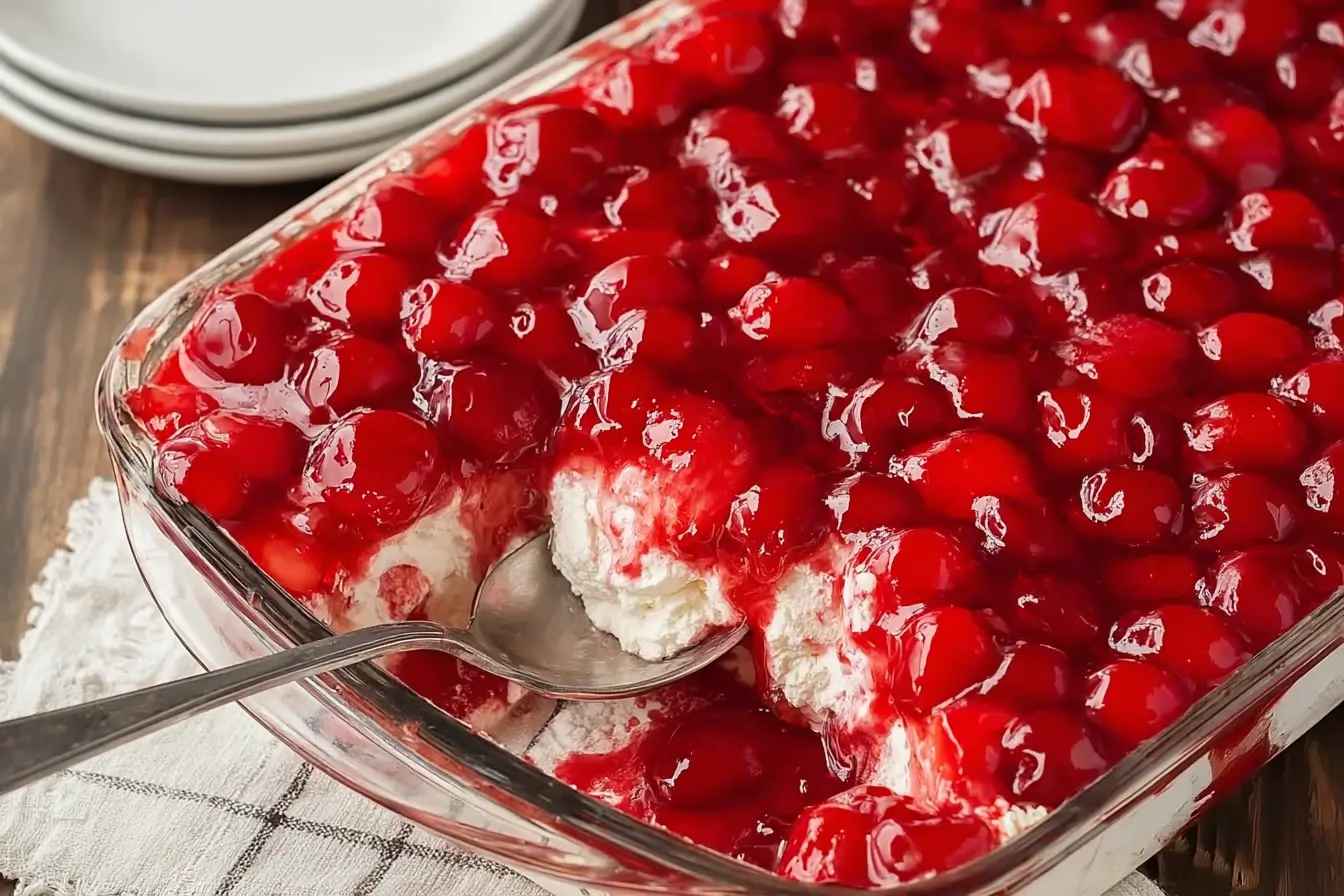
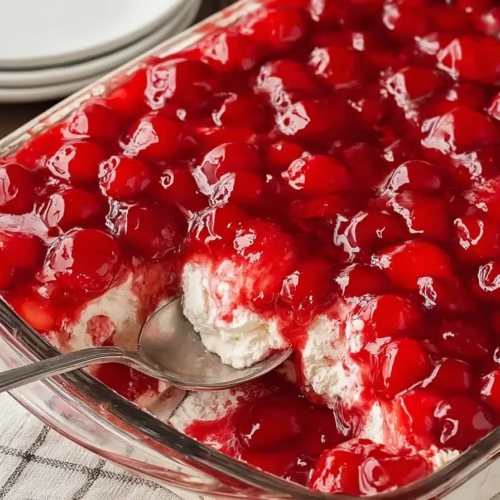
Some desserts don’t just taste good—they feel like a cloud-soft hug in every bite. Cherry Cloud Delight is one of those desserts. Imagine a creamy, sweet base made with fluffy whipped topping, silky cream cheese, and tender chunks of angel food cake, topped with a luscious layer of glossy cherry pie filling. It’s light, fruity, and almost too easy to make.
This recipe is perfect when you need something quick for a potluck, holiday dinner, or Christmas gathering. No baking, no fuss, and just the right balance of tangy cream cheese, airy cake, and juicy cherries..
Let’s dive into everything you need to know—from ingredients and substitutions to step-by-step instructions, variations, and storage tips—so you can whip up this delightful classic in your own kitchen.
Cherry Cloud Delight
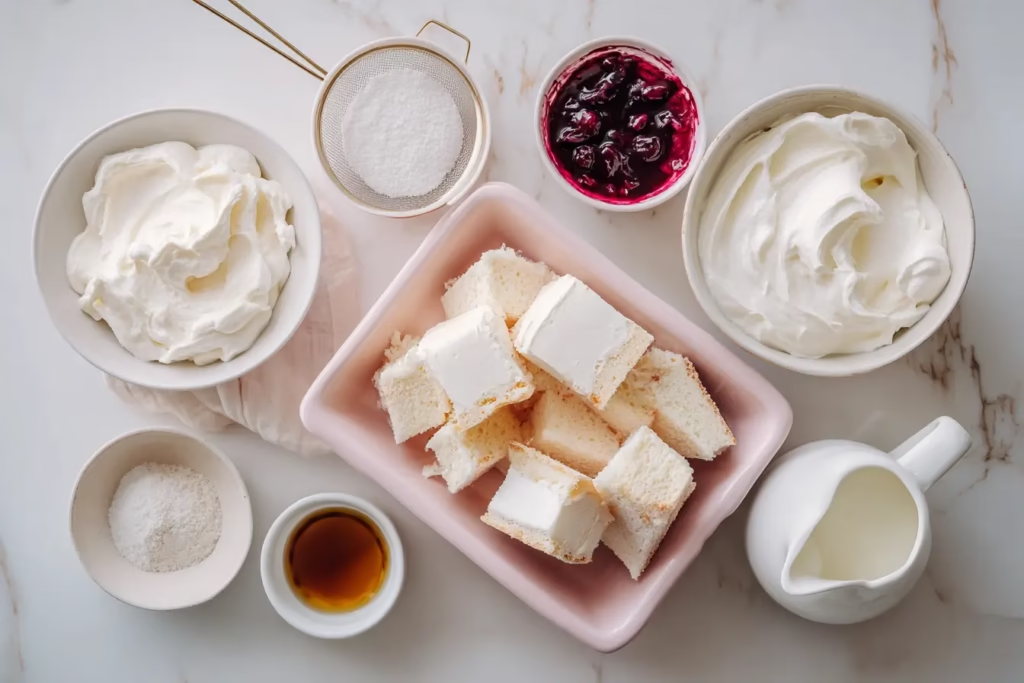
Ingredients
- 12 ounces cream cheese, softened use block-style, not spreadable tub
- ¾ cup powdered sugar sifted
- ⅓ cup whole milk or half-and-half for creamier texture
- ½ teaspoon vanilla extract or almond extract for variation
- 8 ounces frozen whipped topping, thawed or use homemade whipped cream
- 1 cake angel food cake 15 ounces, torn into bite-sized pieces
- 42 ounces cherry pie filling or use homemade cherry compote
Instructions
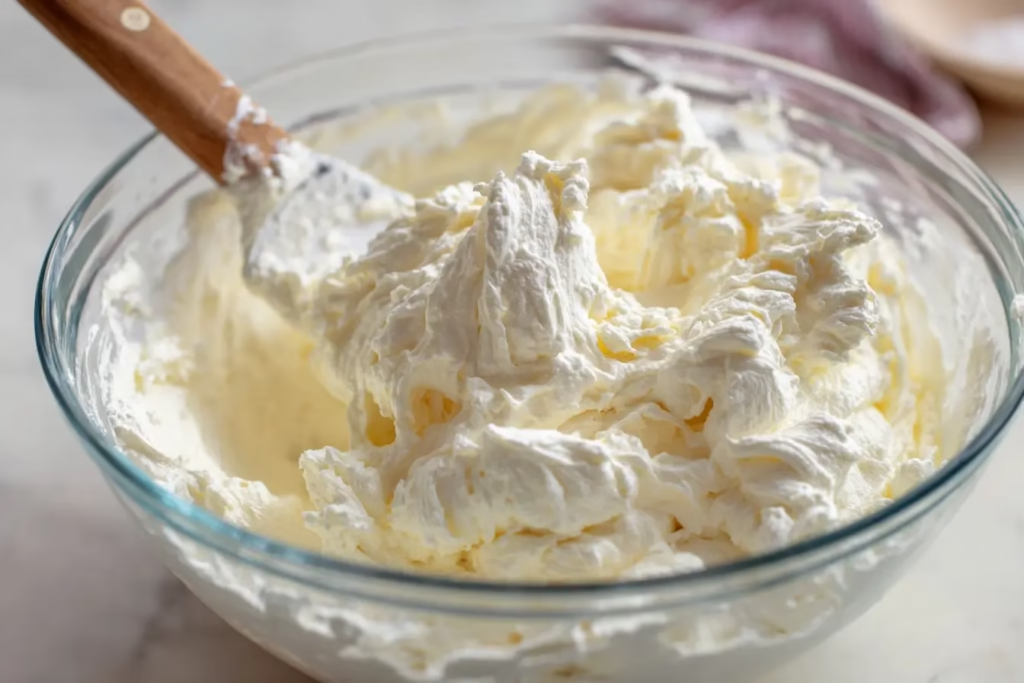
- In a large mixing bowl, beat the softened cream cheese on medium-high speed for 1–2 minutes until smooth and fluffy.
- Add sifted powdered sugar and beat again until creamy and lump-free.
- Pour in the milk and vanilla extract, then mix on medium until smooth, scraping down the sides of the bowl.
- Gently fold in the thawed whipped topping with a spatula until fully combined and no streaks remain.
- Carefully fold in the torn pieces of angel food cake until evenly coated with the creamy mixture.
- Spread the mixture into a 9×13-inch baking dish in an even layer.
- Spoon the cherry pie filling evenly over the top of the dessert.
- Refrigerate for at least 30 minutes before serving to allow the layers to meld.
Notes
Ingredients & Substitutions
Here’s what makes Cherry Cloud Delight shine (and how you can tweak it if needed):
- Cream Cheese (12 ounces, room temp): Gives the dessert a creamy, tangy base. You’ll want block-style cream cheese, not the spreadable tub kind. Substitute with Neufchâtel cheese for a lighter option.
- Powdered Sugar (¾ cup, sifted): Sweetens and helps smooth out the cream cheese mixture. If you prefer less sweetness, reduce slightly.
- Whole Milk (⅓ cup): Keeps the filling fluffy. Half-and-half works for a creamier texture.
- Vanilla Extract (½ teaspoon): A small but mighty flavor booster. Almond extract is also lovely with cherries.
- Frozen Whipped Topping (8 ounces, thawed): Provides that airy, cloud-like texture. Homemade whipped cream is an easy swap if you’d rather skip store-bought.
- Angel Food Cake (1 cake, 15 ounces): Torn into bite-sized pieces, this cake creates lightness in the filling. Store-bought is easiest, but homemade works, too.
- Cherry Pie Filling (42 ounces, 2 cans): The star topping. You can use homemade cherry compote for extra depth or swap with blueberry or strawberry pie filling for a twist.
Step-by-Step Directions
Making Cherry Cloud Delight is all about layering. Here’s how to do it:
1. Prepare the Cream Cheese Mixture
In a large mixing bowl, beat the cream cheese with an electric mixer on medium-high for 1–2 minutes until it’s smooth and fluffy.
2. Incorporate Sugar
Add the sifted powdered sugar and beat again until creamy and lump-free.
3. Add Milk & Vanilla
Pour in the milk and vanilla, then mix on medium until the filling is smooth. Scrape the bowl to ensure everything blends evenly.
4. Fold in Whipped Topping
Gently fold in the whipped topping with a spatula until no streaks remain.
5. Add Cake Pieces
Fold the torn pieces of angel food cake into the creamy mixture. Mix carefully to keep the cake fluffy.
6. Assemble the Dessert
Spread the cream cheese and cake mixture into a 9×13-inch baking dish in an even layer.
7. Top with Cherry Pie Filling
Spoon the cherry pie filling evenly over the top.
8. Chill Before Serving
Refrigerate for at least 30 minutes to allow the layers to meld into cloud-soft perfection.
Prep Time: 15 minutes
Chill Time: 30 minutes
Total Time: 45 minutes
Calories: 206 kcal per serving
Servings: 12
Toppings & Variations
- Nutty Crunch: Sprinkle chopped pecans or toasted almonds over the cherry topping for a festive Christmas touch.
- Chocolate Drizzle: Add a thin drizzle of melted dark chocolate—great for the holidays and a fun Black Forest-inspired twist.
- Citrus Zest: A sprinkle of orange zest adds brightness and makes it feel extra special for holiday desserts.
- Different Fruits: Try blueberry or raspberry pie filling for variety during the Christmas season or year-round.
How to Store Cherry Cloud Delight
- Refrigerator: Cover tightly with plastic wrap or a lid and store in the fridge for up to 3 days.
- Freezer: Not recommended, as the whipped topping and cake may separate upon thawing.
- Make Ahead: You can assemble it the night before serving—just keep it chilled.
Health Benefits of Cherries
Besides being delicious, cherries are loaded with antioxidants, vitamins, and anti-inflammatory properties. They may help improve sleep, support heart health, and reduce soreness after exercise (see more cherry health benefits ). That makes this dessert not only tasty but a little nourishing, too.
FAQs for Cherry Cloud Delight
Can I make Cherry Cloud Delight ahead of time?
Yes! Cherry Cloud Delight is a fantastic make-ahead dessert. In fact, preparing it a few hours in advance allows the cream cheese mixture, cake, and cherry topping to meld together for a more balanced flavor. Simply cover the dish tightly with plastic wrap or a fitted lid and store it in the refrigerator. It’s best served within 24 hours for maximum freshness, but it can hold well for up to 2–3 days.
Can I use homemade whipped cream instead of whipped topping?
Absolutely. Many people prefer homemade whipped cream for a fresher, less processed flavor. To substitute, whip 1½ cups of cold heavy cream with 2–3 tablespoons of powdered sugar until stiff peaks form. Fold it into the cream cheese mixture just as you would with Cool Whip. Keep in mind that homemade whipped cream is less stable, so the dessert may soften more quickly if left out at room temperature.
What can I use instead of angel food cake?
Angel food cake keeps Cherry Cloud Delight light and airy, but sponge cake or even pound cake are great alternatives if you want something more substantial. Sponge cake will still be fluffy but slightly denser, while pound cake gives a rich, buttery contrast to the tangy cream cheese. For a festive holiday version, try using red velvet cake or even gingerbread cubes for a Christmas twist.
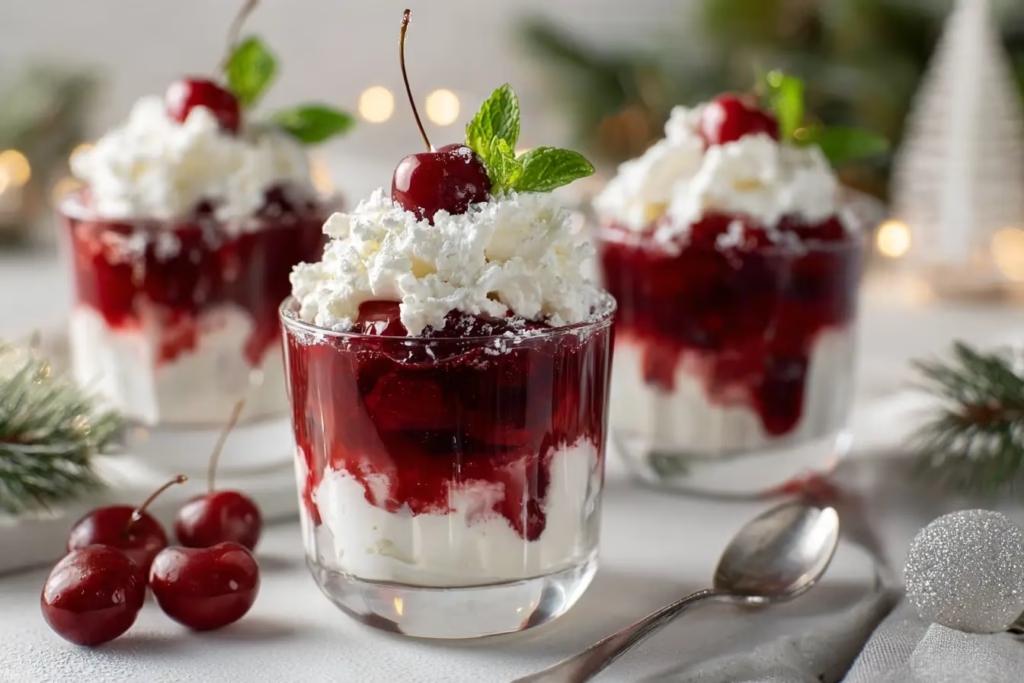
Can I make Cherry Cloud Delight in individual cups?
Yes! This dessert is easily adaptable for individual servings. Layer the cream mixture and cherry topping in parfait glasses, small bowls, or mason jars. This makes it perfect for holidays, parties, or buffets where guests can grab their own serving. To make it extra festive, garnish each cup with a mint leaf, a sprinkle of chocolate shavings, or a dusting of powdered sugar.
Is Cherry Cloud Delight gluten-free?
It can be! The main ingredient to check is the cake. Store-bought angel food cakes often contain wheat, so opt for a gluten-free angel food cake if needed. The cream cheese, whipped topping, powdered sugar, milk, and cherry pie filling are naturally gluten-free. Always double-check ingredient labels, especially for pie fillings, to ensure there are no hidden gluten-based thickeners.
How long does Cherry Cloud Delight need to chill?
At least 30 minutes is necessary for the layers to firm up, but 1–2 hours of chilling will give the best results. The cream cheese mixture sets more firmly, and the flavors deepen as they rest together. If you’re making it for a holiday dinner or potluck, chilling overnight is perfectly fine—just cover tightly so the cake doesn’t dry out or absorb fridge odors.
Bringing It All Together
Cherry Cloud Delight isn’t just a dessert—it’s a showstopper that always disappears fast. Creamy, fruity, and light as a feather, it’s perfect for any occasion, from summer BBQs to Christmas potlucks. You can even serve it in small parfait glasses as an elegant holiday dessert centerpiece.
It’s one of those no-bake desserts that saves time during busy holidays but still looks like you went all out. Whether it’s part of your Christmas dessert table, a holiday brunch, or simply a sweet treat to share, Cherry Cloud Delight has that festive charm baked (well, chilled) right in.
For more easy, no-bake desserts, check out these favorites:
- Old-Fashioned No-Bake Strawberry Delight
- No-Bake Orange Creamsicle Pie
- Strawberry Cheesecake Dump Cake
- Vanilla Dream Pie
- Banana Pudding
And for more sweet ideas, follow me on Facebook and Pinterest.