
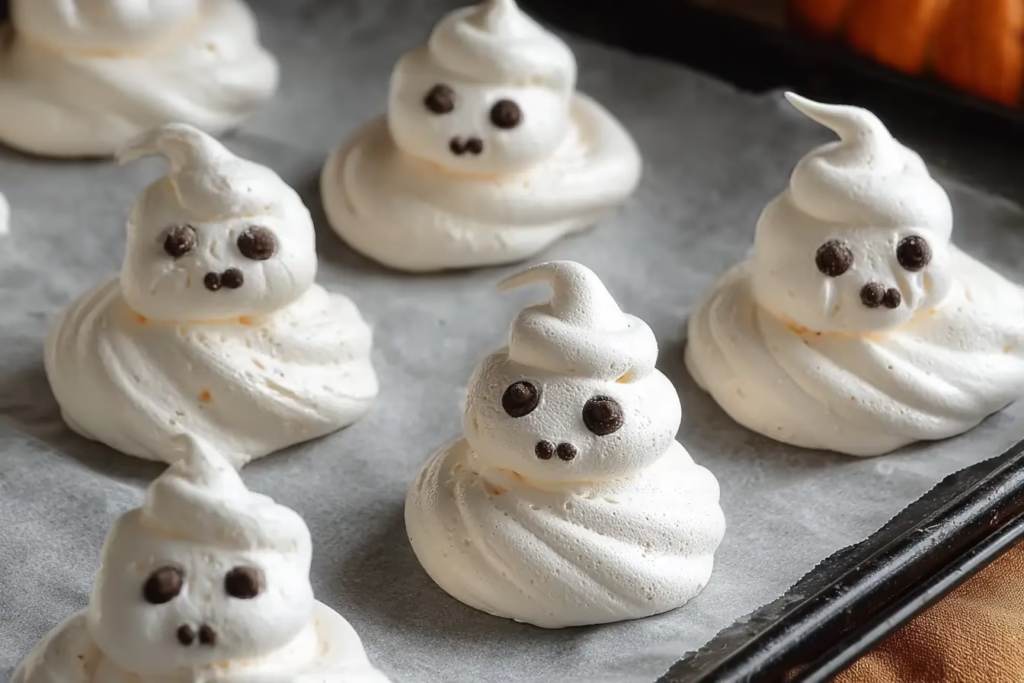
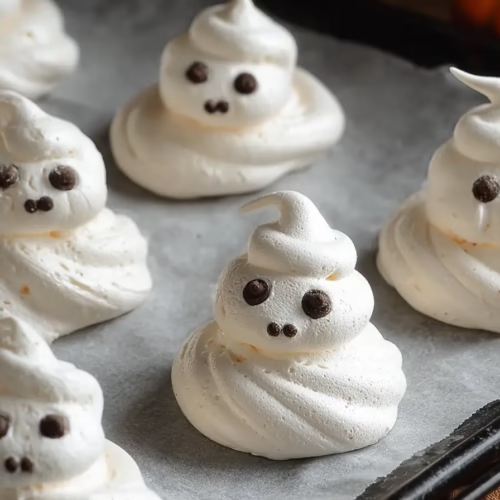
Halloween is my favorite excuse to transform the simplest kitchen ingredients into magical, spooky creations. These Ghostly Meringues are a prime example. With just a few egg whites, sugar, and a little imagination, you can pipe adorable ghost shapes that look like they’ve floated right out of a haunted house. Crisp on the outside, melt-in-your-mouth on the inside, and finished with chocolate chip eyes, they’re equal parts dessert and décor.
I first made these for a Halloween school bake sale, and the reaction was priceless. The kids squealed, the teachers laughed, and the trays vanished within minutes. They’ve since become a staple on my Halloween party table, right next to my Pumpkin Cheese Ball and no-bake Halloween Dirt Cups.
So, whether you’re planning a Pinterest-worthy dessert spread or just want a playful project with the kids, these meringue ghosts are ready to float their way into your kitchen.
Ghostly Meringues
Ingredients
- 4 large egg whites room temperature
- 1 cup granulated sugar superfine preferred for smoother texture
- 1/2 teaspoon cream of tartar or use 1 teaspoon lemon juice or vinegar
- 1 teaspoon vanilla extract or substitute almond or pumpkin spice extract
- 60 mini chocolate chips for eyes
Instructions
- Preheat the oven to 225°F (110°C) and line a baking sheet with parchment paper.
- In a large bowl, beat the egg whites until foamy using a mixer on medium speed.
- Add cream of tartar and continue beating until soft peaks form.
- Increase the speed to high and gradually add sugar, one tablespoon at a time, until stiff, glossy peaks form. Rub a bit of meringue between your fingers—if it’s gritty, keep beating.
- Gently fold in the vanilla extract.
- Transfer the meringue to a piping bag fitted with a round tip.
- Pipe ghost shapes onto the parchment-lined baking sheet, creating small mounds with a peak at the top.
- Place two mini chocolate chips on each meringue to create ghost eyes.
- Bake for 1.5 to 2 hours until the meringues are dry and crisp.
- Turn off the oven and let the meringues cool completely inside the oven to prevent cracking.
Notes
Nutrition
Why You’ll Love These Ghostly Meringues
Spooky Halloween Desserts
They’re light, airy, and perfectly themed for spooky season. Just looking at them brings a playful chill to the table.
Kid-Friendly Halloween Recipes
Children love helping pipe the ghosts and adding candy eyes. It’s baking and craft time rolled into one!
No-Fuss Party Sweets
Unlike layer cakes or pies, these cookies require minimal effort. Once baked, they can be stored for days without losing their crunch.
Pinterest-Worthy Halloween Treats
Their adorable ghostly shapes are perfect for styling on spooky boards and seasonal social shares.
DIY Edible Halloween Decorations
Set them on a dessert platter or tuck them into a Halloween centerpiece—they double as decoration and dessert.
Budget-Friendly Holiday Desserts
Egg whites, sugar, and chocolate chips: three ingredients that won’t stretch your grocery budget.
Gluten-Free Halloween Recipes
Naturally gluten-free, they’re a safe bet for guests with dietary needs.
Trick-or-Treat Party Snacks
Lightweight and portable, kids can grab them on the way to the next candy stop.
Creative Halloween Baking Ideas
Meringues are a blank canvas. Turn them into ghosts, mummies, or even snowmen for the holidays.
Make-Ahead Halloween Cookies
Bake them days in advance so you’re not scrambling before the party.
Ingredients Breakdown & Substitutions
- Egg Whites: Fresh eggs give the fluffiest meringues, but carton egg whites can also be used. Just make sure they’re pasteurized and at room temperature.
- Granulated Sugar: Essential for structure and sweetness. For a smoother texture, superfine sugar works beautifully.
- Cream of Tartar: Stabilizes the egg whites. No cream of tartar? Use a splash of lemon juice or vinegar instead.
- Vanilla Extract: Adds subtle flavor. Almond extract or even pumpkin spice extract can be used for a seasonal twist.
- Mini Chocolate Chips: The easiest “eyes.” Candy pearls or melted chocolate dots also work.
Step-by-Step Instructions
- Prep the Oven
Preheat to 225°F (110°C). Line a baking sheet with parchment paper. - Whip the Egg Whites
Beat egg whites until foamy, then add cream of tartar. Continue until soft peaks form. - Sweeten the Meringue
Increase speed and gradually add sugar, one tablespoon at a time, until stiff glossy peaks form. Rub a bit between your fingers—if it feels gritty, keep beating until sugar dissolves. - Flavor It
Fold in vanilla extract gently. - Pipe the Ghosts
Transfer to a piping bag with a round tip. Pipe small mounds with pointed tops onto parchment. - Add Eyes
Place two mini chocolate chips into each mound as eyes. - Bake Low & Slow
Bake for 1.5–2 hours until crisp. Turn off the oven and let meringues cool completely inside.
Variations, Storage & Serving Ideas
- Mummy Meringues: Pipe longer shapes, then drizzle with white chocolate “bandages.”
- Pumpkin Spice Ghosts: Add ½ teaspoon pumpkin pie spice for a seasonal flavor.
- Snowy Ghosts: Dust with edible glitter for a frosty Halloween sparkle.
- Storage: Keep in an airtight container at room temperature for up to 5 days. Avoid humidity—it makes them chewy.
- Serving: Display on a Halloween dessert board alongside Halloween Cupcakes.
FAQs
How do I prevent meringues from cracking?
Bake at a low temperature and allow them to cool inside the oven. The slow cooling prevents sudden cracks.
Can I make ghost meringues without a piping bag?
Yes! Use a zip-top bag with the corner snipped off for piping, or spoon small mounds for a rustic look.
Do meringues need refrigeration?
No, refrigeration introduces moisture. Store them at room temperature in a sealed container.
Why are my meringues chewy instead of crisp?
Humidity is the culprit. Bake a bit longer or place them back in the oven at 200°F for 10 minutes to dry out.
A Ghostly Treat Worth Sharing
These Ghostly Meringues aren’t just cookies; they’re a little Halloween memory in the making. Whether you’re baking them with kids, styling them for Pinterest, or adding them to your party spread, they’re guaranteed to make guests smile.
For more festive ideas, explore my collection of fall and Halloween treats like Pumpkin Cheese Ball, Halloween Dirt Cups, and Halloween Cupcakes.
And don’t forget to follow along on Pinterest and Facebook for even more recipes, styling tips, and behind-the-scenes kitchen fun.