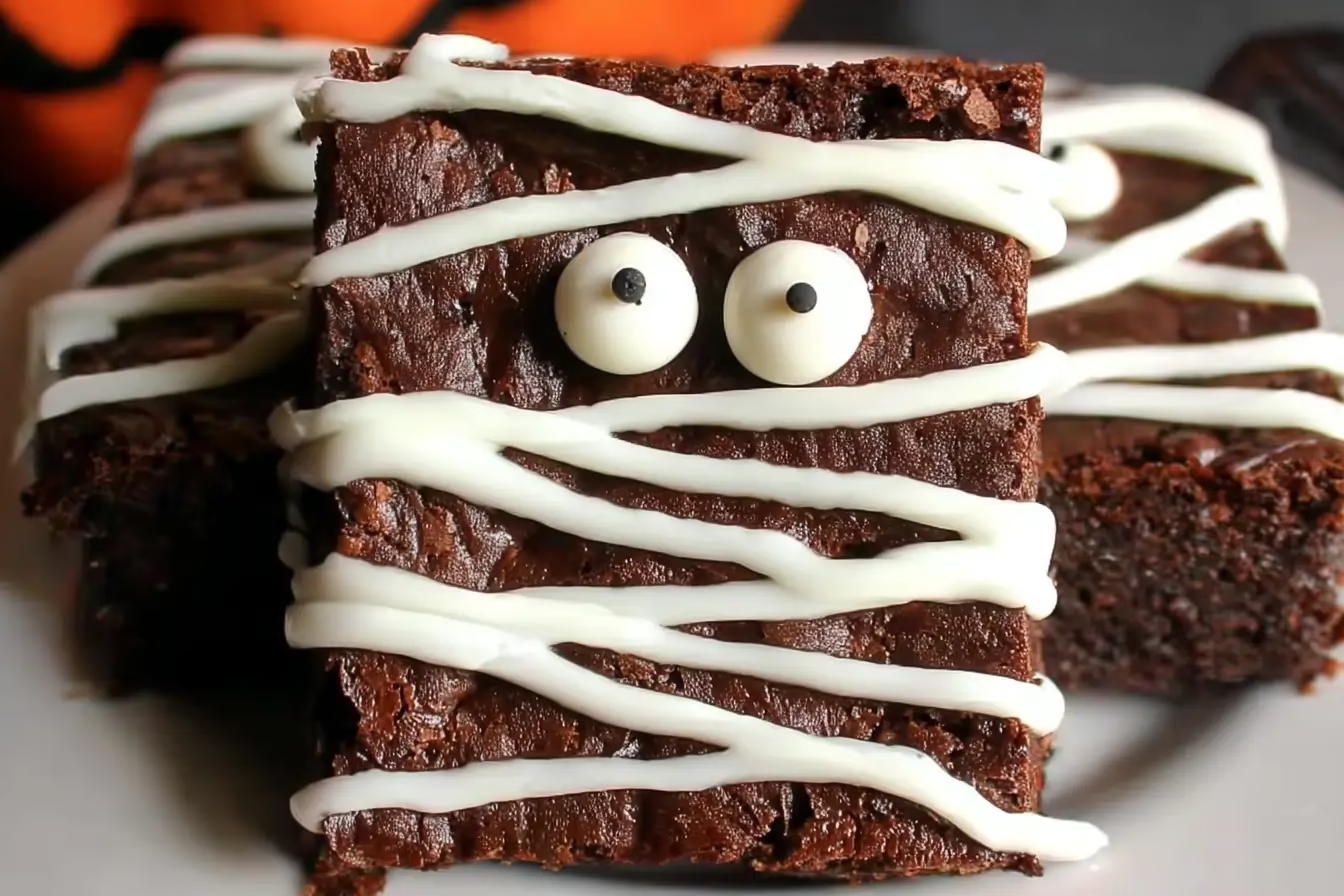
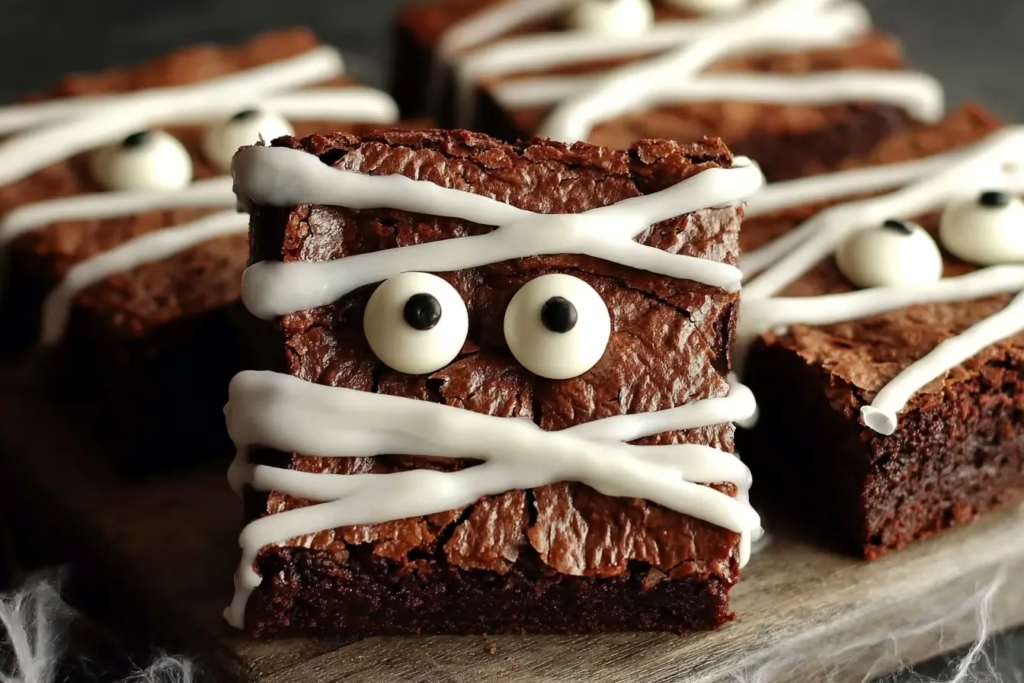
Halloween desserts don’t always have to be complicated or over-the-top to make an impression. Sometimes, the simplest treats get the biggest reactions—like these Halloween Brownies. Picture fudgy squares of chocolate bliss transformed into spooky brownies with white chocolate spiderwebs and candy-eyed mummies. They’re the kind of Halloween inspired desserts that work just as well for a family movie night as they do for a full-on Halloween buffet.
I first made these during a neighborhood Halloween party, and the kids couldn’t stop giggling over the “mummy faces” staring back at them. Parents loved that it was a classic brownie base with just a playful twist. Whether you’re planning a witch themed snack spread, looking for spooky season recipes, or just need something quick to fill a Halloween traybake, this recipe brings fun, flavor, and festivity in every bite.


Halloween Brownies
Ingredients
- 1 box brownie mix any brand; or substitute with homemade brownie batter
- eggs, oil, and water as instructed on the brownie mix box; use melted butter instead of oil for richer flavor
- ½ cup white chocolate or substitute with almond bark or white candy melts
- candy eyes for mummy brownies; substitute with mini chocolate chips or white chocolate dots with chocolate centers
- optional chopped Oreos or Reese’s Pieces stir into batter for extra texture
- optional caramel drizzle swirl into batter before baking for added gooeyness
Instructions
- Preheat oven to 350°F (175°C). Line a 9×9-inch baking pan with parchment paper, leaving overhang for easy lifting. Lightly grease the pan.
- Prepare brownie batter according to package directions (or your favorite homemade recipe). Pour into lined pan and bake as instructed.
- Allow brownies to cool completely in the pan, then lift out using parchment paper and slice into 9–12 squares.
- Melt white chocolate in a microwave-safe bowl in 30-second bursts, stirring in between until smooth.
- Transfer melted chocolate to a piping bag (or zip-top bag with corner snipped). Pipe spiderwebs on some brownies, and mummy bandages on others.
- Press candy eyes onto the mummy brownies while the chocolate is still soft.
- Let chocolate decorations firm at room temperature or refrigerate for a few minutes. Serve on a festive Halloween platter.
Notes
Why You’ll Love These Halloween Brownies
These brownies aren’t just dessert—they’re conversation starters. Here’s why they deserve a place on your Halloween bakery treats menu:
- Easy & Foolproof: With a boxed brownie mix as the base, you’ll have a sturdy, fudgy foundation without the stress.
- Festive Fun: White chocolate spiderwebs and mummy eyes give each square a personality of its own.
- Customizable: Perfect for making ahead and decorating with kids or friends.
- Aesthetic Appeal: They look like they belong in a lineup of Halloween desserts aesthetic posts on Instagram.
If you’ve already tried my Halloween Nachos or Ghostface Chocolate Covered Strawberries, these brownies are the next upgrade for your spooky snack lineup.
Ingredients Breakdown (With Substitutions)
Here’s what you’ll need to whip up these spooky brownies:
- 1 box brownie mix: Any brand works. If you prefer homemade, you can swap in your favorite from-scratch brownie batter recipe.
- Eggs, oil, and water: Added as instructed on the brownie mix box. Use melted butter instead of oil for a richer flavor.
- ½ cup white chocolate: Smooth, sweet, and perfect for piping designs. Swap in almond bark or white candy melts if you prefer.
- Candy eyes: The key to those adorable mummy brownies. If you can’t find them, use mini chocolate chips or small white chocolate dots with a chocolate center.
Optional Add-ins:
- Stir chopped Oreos or Reese’s Pieces into the batter for extra texture.
- Drizzle with caramel before baking for gooey depth.
Step-by-Step Instructions
Step 1: Prepare the pan
Preheat the oven to 350°F (175°C). Line a 9×9-inch baking pan with parchment paper, leaving a bit hanging over the edges for easy lifting later. Lightly grease for extra non-stick assurance.
Step 2: Bake the brownies
Prepare the brownie batter according to the package directions. Pour into the lined pan and bake as directed. Once done, allow the brownies to cool completely in the pan.
Step 3: Slice and set up
Lift the cooled brownies from the pan using the parchment paper. Place on a cutting board and slice into even squares—usually 9–12 pieces.
Step 4: Melt the white chocolate
In a microwave-safe bowl, melt the white chocolate in 30-second bursts, stirring in between until smooth.
Step 5: Decorate with spooky flair
- Transfer the melted chocolate into a piping bag (or zip-top bag with a small corner snipped).
- Pipe spiderwebs across some brownies.
- Pipe mummy “bandages” across others, then immediately press candy eyes into place.
Step 6: Set and serve
Allow the chocolate decorations to firm up at room temperature or refrigerate for a few minutes. Plate them up on a Halloween traybake platter, and watch the magic happen.
Variations, Storage & Serving Ideas
- Vampire Snacks: Drizzle red candy melts alongside the webs for a gory twist.
- Witch Themed Snacks: Top with green frosting hats or candy witches’ brooms.
- Halloween Buffet Ready: Arrange them with Eyeball Jello Shots and Pumpkin Scones for a dessert spread that wows.
- Storage: Keep in an airtight container at room temperature for up to 3 days. Refrigerate for up to 5.
For a crowd, consider doubling the recipe and using a 9×13-inch pan for an even bigger Halloween bakery treat batch.
FAQs About Halloween Brownies
1. Can I make these Halloween brownies ahead of time?
Yes! Bake and slice the brownies a day in advance. Decorate them with white chocolate webs and mummy eyes the day of your event to keep them fresh and festive.
2. What if I don’t have candy eyes?
No worries. You can easily make DIY eyes by piping small white chocolate dots and topping them with mini chocolate chips or edible black gel.
3. How do I make these brownies more festive?
Add Halloween sprinkles, red “blood” drizzle, or mix in themed candies. Pair them with other Halloween sprinkle cookies for a colorful tray.
4. Can I freeze Halloween brownies?
Yes, but freeze them undecorated. Wrap tightly and freeze up to 2 months. Thaw and decorate with fresh chocolate webs before serving.
Conclusion
Halloween is about more than candy—it’s about creating memories with food that makes everyone smile. These spooky brownies are proof that with a little creativity, even a box of brownie mix can become the centerpiece of your Halloween desserts aesthetic.
Serve them at your next Halloween sleepover, add them to a Halloween buffet, or pack them up as witch themed snacks for a classroom party. However you present them, these brownies are sure to be a hit.
And don’t forget—you can always find more spooky inspiration on my Pinterest page and connect with me on Facebook for the latest spooky season recipes and dessert ideas.