Easter is a time for family, fun, and, of course, delicious treats! If you’re looking for the perfect dessert to brighten up your Easter table, these No-Bake Easter Mini Cheesecakes are just the thing. They’re creamy, fluffy, and incredibly easy to make—no oven required! Plus, their adorable pastel decorations and mini size make them an absolute showstopper. Whether you’re hosting a big Easter gathering or just want a sweet treat to celebrate the season, these cheesecakes are guaranteed to be a hit.
And if you’re looking for more fun Easter treats, be sure to check out our Rice Krispie Easter Eggs Recipe—a colorful and crispy delight that kids and adults will love!
Why You’ll Love These Mini Cheesecakes
✔ No baking required – Perfect for busy holiday prep or when you don’t want to turn on the oven.
✔ Individual servings – Cute, portion-controlled, and easy to serve at parties.
✔ Rich and creamy texture – The perfect balance of sweetness and tanginess.
✔ Easily customizable – Add different toppings, flavors, or decorations to make them uniquely yours!
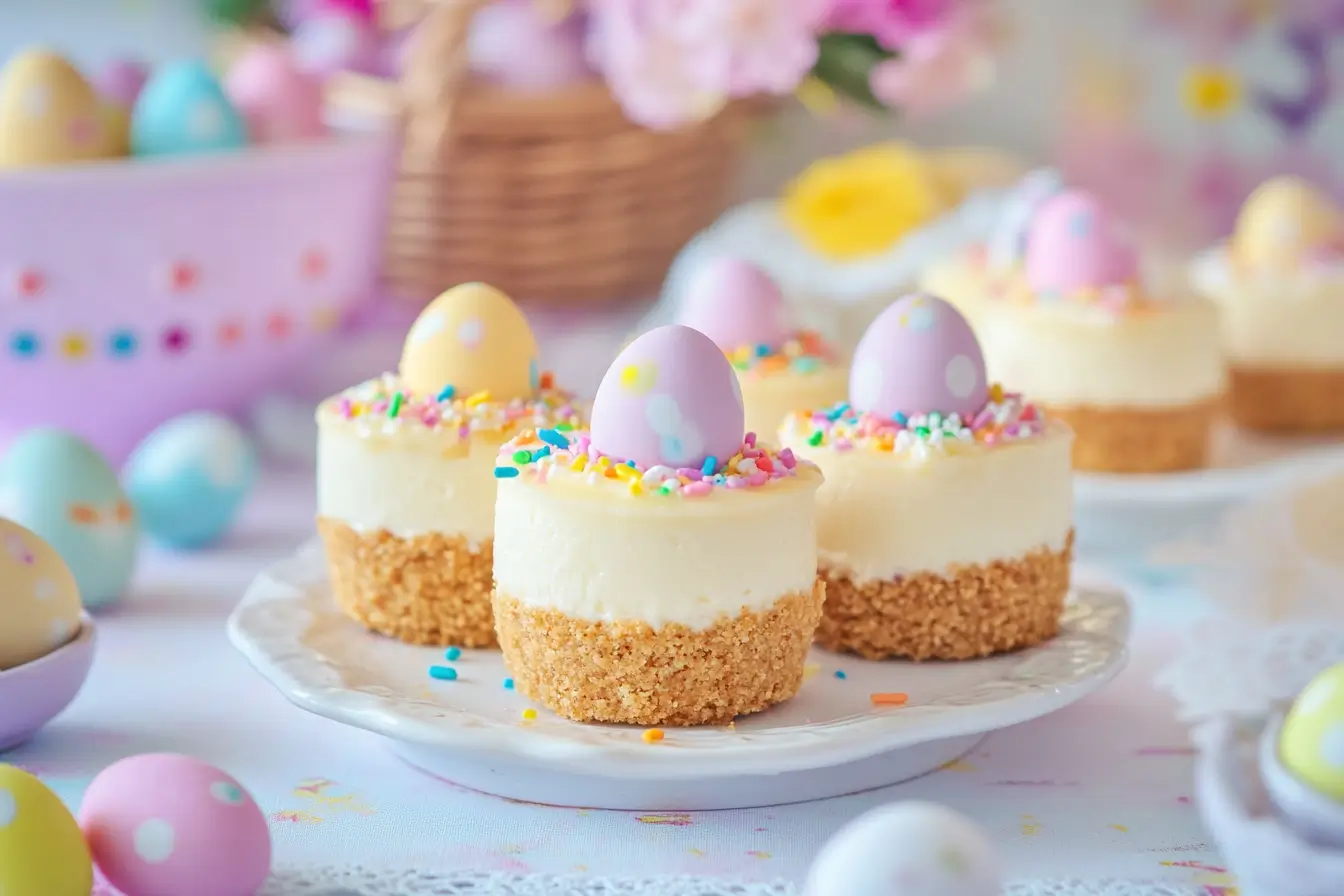
✔ Perfect for Easter – Decorate with mini eggs, coconut nests, or pastel sprinkles for a festive touch!
If you’re a cheesecake lover, you might also enjoy learning about the difference between classic cheesecake and French-style cheesecake—perfect for any dessert enthusiast!
Ingredients & Substitutions
These mini cheesecakes require simple ingredients that come together for a perfectly creamy and flavorful dessert. Here’s what you’ll need:
For the Crust:
- 1 ½ cups graham cracker crumbs – The classic cheesecake base. You can also use digestive biscuits, vanilla wafers, or crushed Oreos for a different flavor.
- ¼ cup granulated sugar – Adds a touch of sweetness to the crust.
- 6 tablespoons unsalted butter, melted – Binds the crust together and gives it a rich flavor.
For the Cheesecake Filling:
- 8 ounces (1 block) cream cheese, softened – Full-fat cream cheese works best for a rich and creamy texture. If you’re curious about its nutritional value, check out this guide on cream cheese health benefits and downsides.
- ½ cup powdered sugar – Gives the filling a smooth and light sweetness.
- 1 teaspoon vanilla extract – Adds warmth and depth of flavor.
- 1 tablespoon lemon juice – Helps balance the sweetness and enhances the flavor.
- ½ cup heavy whipping cream – Whipped until fluffy, giving the cheesecake a light and airy texture.
For the Toppings & Decorations:
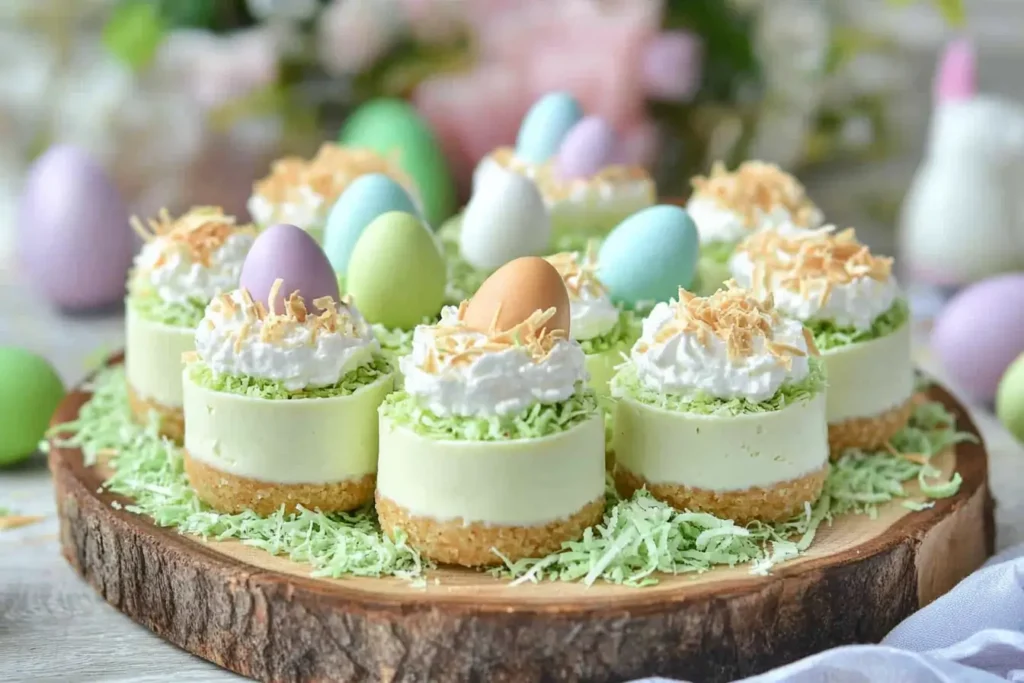
- Whipped cream – For a soft, cloud-like topping.
- Shredded coconut – Lightly dyed green to resemble “grass” for an Easter nest effect.
- Mini chocolate eggs – Cadbury Mini Eggs, M&Ms, or jelly beans make adorable Easter decorations.
- Pastel sprinkles – For a fun and festive touch.
How to Make No-Bake Easter Mini Cheesecakes
Step 1: Prepare the Crust
- Start by crushing your graham crackers (or other cookies) into fine crumbs using a food processor or a ziplock bag with a rolling pin.
- Transfer the crumbs to a bowl and mix in the melted butter and sugar until the texture is like damp sand.
- Line a muffin tin with cupcake liners and divide the crumb mixture evenly among the cups.
- Press the crumbs firmly into the bottom of each liner using the back of a spoon or a small glass.
- Place the muffin tin in the fridge to chill while you prepare the filling.
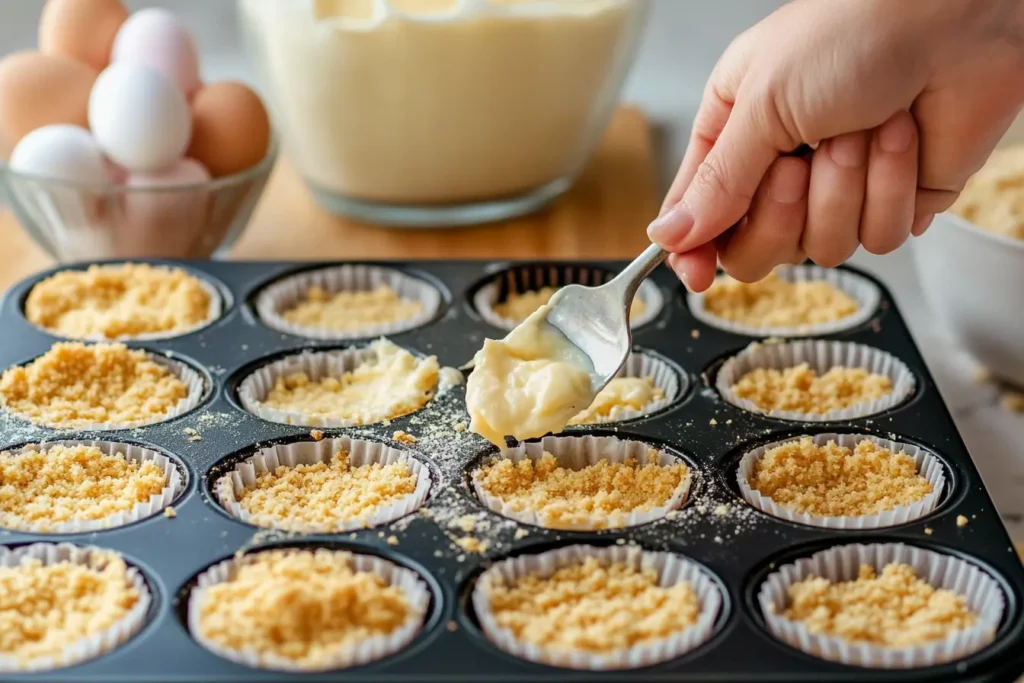
Step 2: Make the Cheesecake Filling
- In a large mixing bowl, beat the softened cream cheese until smooth and lump-free.
- Add the powdered sugar, vanilla extract, and lemon juice, then continue mixing until fully combined.
- In a separate bowl, whip the heavy cream until stiff peaks form.
- Gently fold the whipped cream into the cream cheese mixture using a spatula, being careful not to deflate the airiness.
Step 3: Assemble & Chill
- Spoon or pipe the cheesecake filling onto the chilled crusts, smoothing the tops with a spatula.
- Place the muffin tin in the fridge and let the cheesecakes chill for at least 3-4 hours, or preferably overnight. This helps them set properly.
Step 4: Decorate Your Easter Cheesecakes
Once the cheesecakes are set, it’s time to decorate! Get creative with these fun Easter-inspired toppings:
- Whipped Cream Swirls – Pipe a little whipped cream on top for extra fluffiness.
- Coconut “Grass” – Toss shredded coconut with a few drops of green food coloring and sprinkle it over the cheesecakes to create a nest effect.
- Mini Chocolate Eggs – Add 2-3 mini eggs or M&Ms in the center of each cheesecake.
- Sprinkles & Edible Glitter – Make them extra festive with pastel sprinkles or a touch of edible shimmer.
Pair these cheesecakes with a refreshing Pink Drink—a vibrant and fruity beverage that complements any sweet treat!
Toppings & Variations
Want to switch things up? Here are some fun ways to customize these cheesecakes:
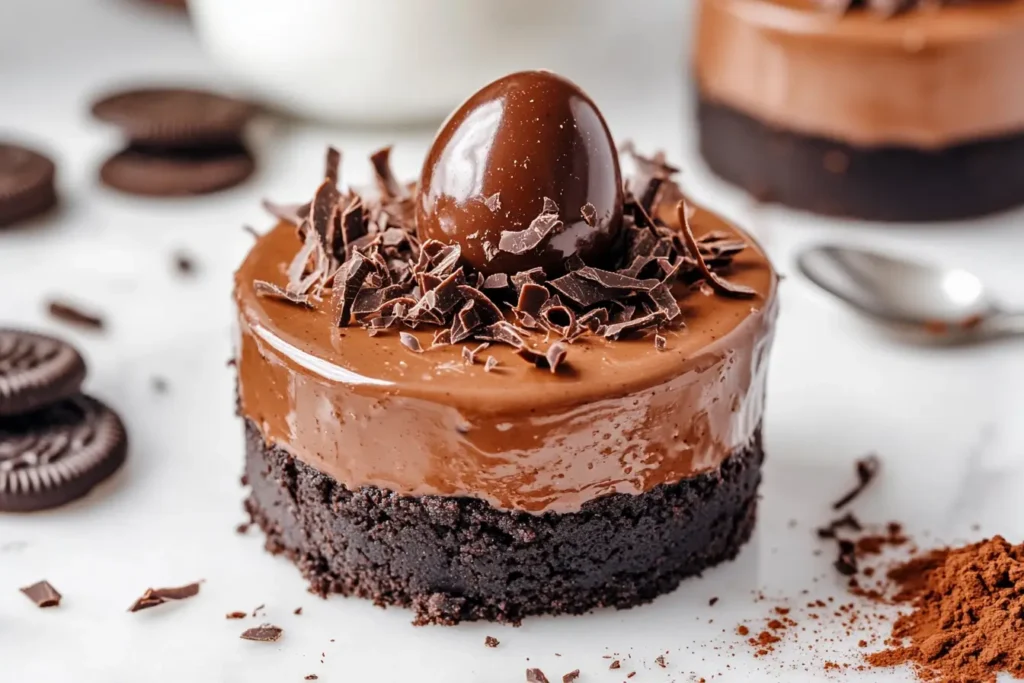
1. Chocolate Lovers’ Version
- Use crushed Oreo cookies instead of graham crackers for the crust.
- Add cocoa powder to the cheesecake filling for a chocolatey twist.
- Drizzle melted chocolate over the top before serving.
2. Fruity Easter Cheesecakes
- Top with fresh berries like strawberries, raspberries, or blueberries.
- Swirl in fruit preserves (such as lemon curd or raspberry jam) into the cheesecake mixture.
- Add a spoonful of lemon zest for a fresh citrus kick.
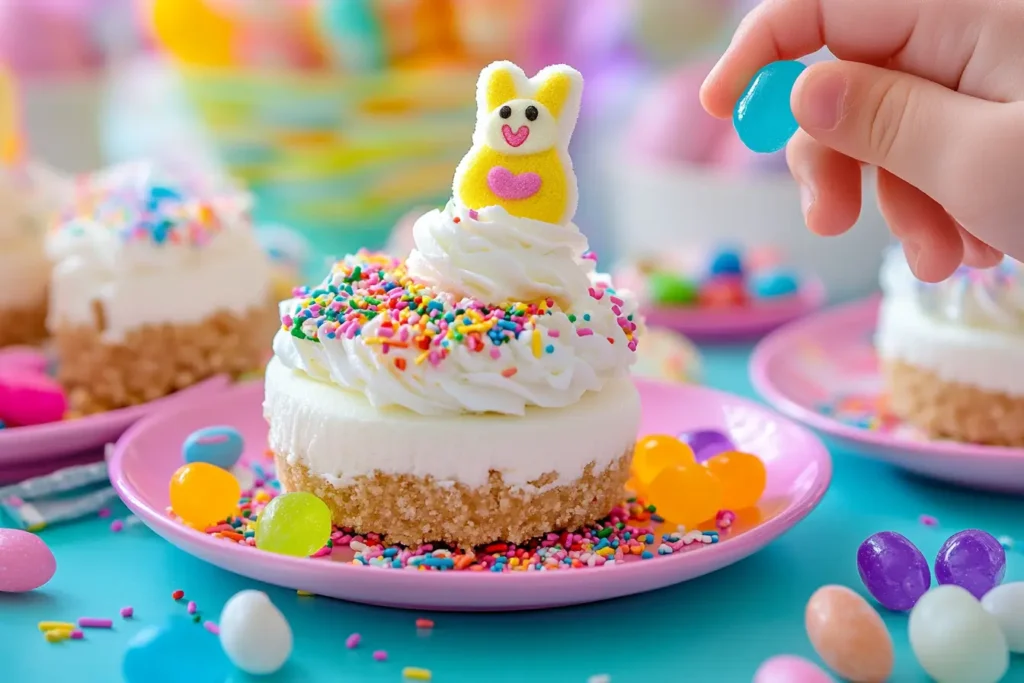
3. Kid-Friendly Fun
- Let the kids decorate their own cheesecakes with their favorite toppings!
- Add gummy bunnies or marshmallow Peeps for extra Easter cheer.
How to Store No-Bake Mini Cheesecakes
In the Refrigerator:
- Store the cheesecakes in an airtight container in the fridge for up to 5 days.
- Keep them chilled until serving to maintain their creamy texture.
In the Freezer:
- Freeze undecorated cheesecakes for up to 2 months.
- Wrap them individually in plastic wrap and store in a freezer-safe container.
- When ready to eat, thaw in the fridge overnight and decorate fresh.
FAQs
Can I Make These Cheesecakes in a Full-Size Pan?
Yes! Instead of mini cheesecakes, you can make this recipe in a 9-inch springform pan. Just press the crust into the bottom, spread the filling over the top, and chill overnight before slicing.
Can I Use Store-Bought Whipped Topping Instead of Whipping Cream?
Yes! If you prefer a shortcut, you can substitute whipped cream with Cool Whip or another store-bought whipped topping.
What If I Don’t Have a Muffin Tin?
You can use silicone cupcake molds, small ramekins, or even mini glass jars for a unique presentation.
Final Thoughts: A Delightful Easter Treat!
These No-Bake Easter Mini Cheesecakes are everything you could want in a festive dessert—adorable, easy to make, and absolutely delicious. They require minimal effort but deliver maximum flavor, making them perfect for Easter brunch, family gatherings, or springtime celebrations.
Whether you keep them classic or get creative with toppings, these cheesecakes are sure to bring smiles all around. So grab your mixing bowl, gather your favorite Easter candies, and whip up a batch of these delightful treats. Happy Easter and happy baking!
No-Bake Easter Mini Cheesecakes
Ingredients
- 1 ½ cups graham cracker crumbs or digestive biscuits, vanilla wafers, or crushed Oreos
- ¼ cup granulated sugar
- 6 tablespoons unsalted butter, melted
- 8 ounces cream cheese, softened full-fat recommended
- ½ cup powdered sugar
- 1 teaspoon vanilla extract
- 1 tablespoon lemon juice
- ½ cup heavy whipping cream whipped to stiff peaks
- whipped cream for topping
- shredded coconut dyed green for grass effect
- mini chocolate eggs Cadbury Mini Eggs, M&Ms, or jelly beans
- pastel sprinkles for decoration
Instructions
- Crush the graham crackers into fine crumbs using a food processor or a ziplock bag with a rolling pin.
- In a bowl, combine graham cracker crumbs, melted butter, and granulated sugar. Mix until the texture resembles damp sand.
- Line a muffin tin with cupcake liners and divide the crumb mixture evenly among the cups. Press firmly into the bottoms.
- Chill the crusts in the refrigerator while preparing the filling.
- In a large bowl, beat the softened cream cheese until smooth and lump-free.
- Add powdered sugar, vanilla extract, and lemon juice to the cream cheese and mix until fully combined.
- In a separate bowl, whip heavy cream until stiff peaks form.
- Gently fold the whipped cream into the cream cheese mixture using a spatula.
- Spoon or pipe the cheesecake filling onto the chilled crusts, smoothing the tops.
- Refrigerate the mini cheesecakes for at least 3-4 hours or overnight until set.
- Decorate the set cheesecakes with whipped cream, green-dyed shredded coconut, mini chocolate eggs, and pastel sprinkles.
Notes